Walk Through of Features
This article walks you through the various things the TypeScript Analyzer can do, with pictures.
Basic Lint
Install the TypeScript Analyzer and create a new Blank Node Console Application with TypeScript.
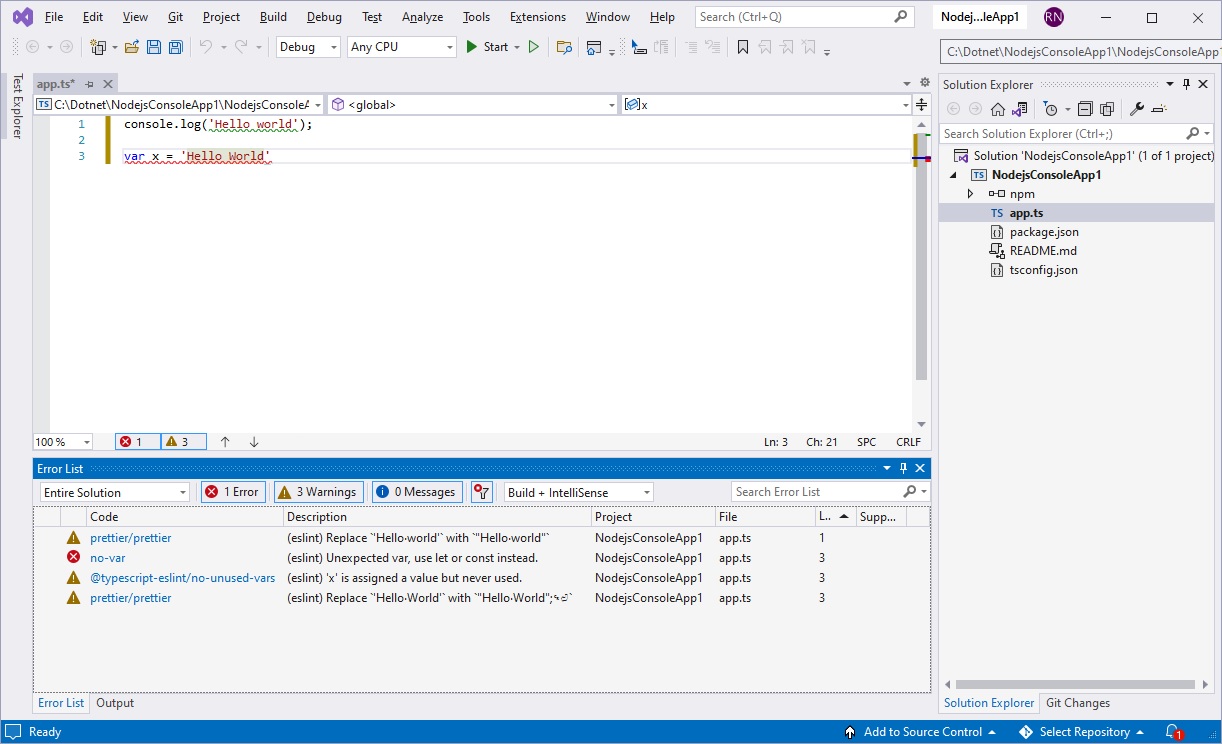
If you are using Visual Studio 2017, or Visual Studio 2019, or a version of Visual Studio 2022 before 17.4 then type in var x = 'Hello World' and after a few seconds the TypeScript Analyzer will lint the code file and show appropriate errors and warnings.
Sadly in Visual Studio 2022 v17.4 and later Microsoft decided to configure ESLint locally to do nothing in a Node Console Application with TypeScript. This rather spoiled this walkthrough. The TypeScript Analyzer picks up and uses this local configuration and does nothing. To force it to show errors go to Tools/Options/TypeScript Analyzer and set both ‘Enable local config (.eslintrc.js)’ and ‘Enable local node_modules’ to False. This forces the TypeScript Analyzer to use its own default configuration. Then type in var x = 'Hello World' and after a few seconds the TypeScript Analyzer will lint the code file and show appropriate errors and warnings. More information on this is available.
Fix a Code File
Right-click in the code window. The context menu has TypeScript Analyzer options.
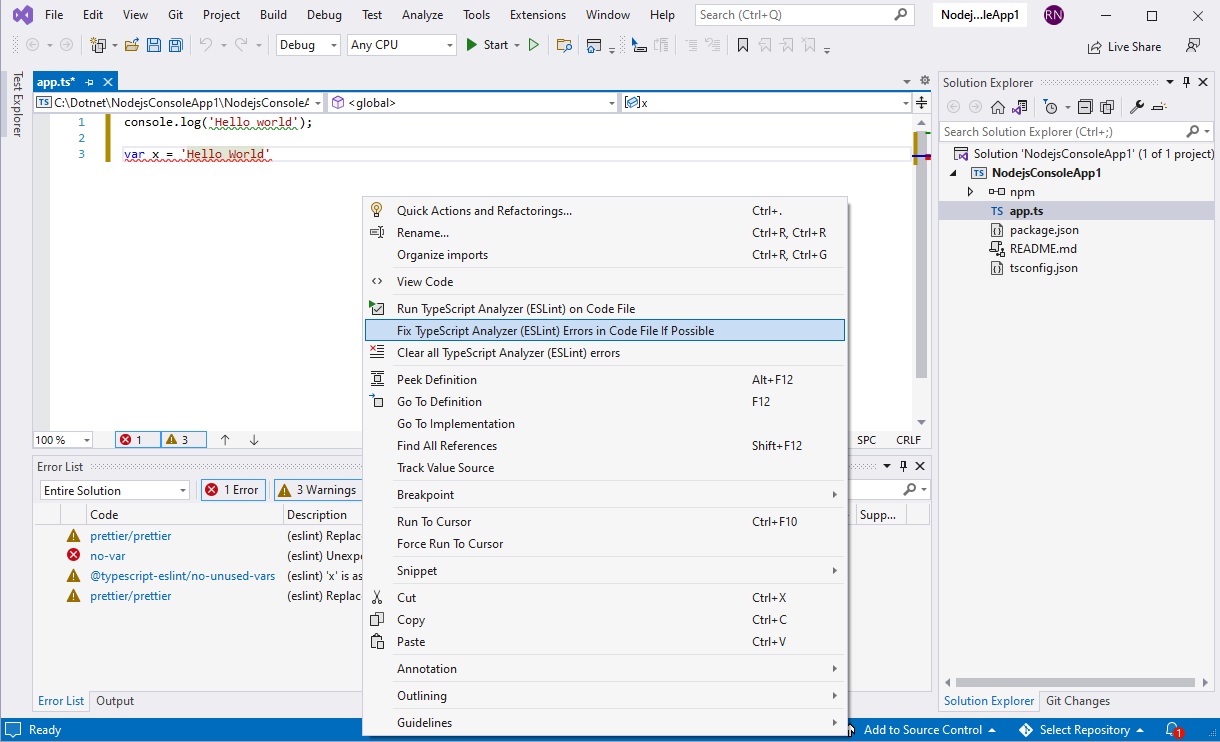
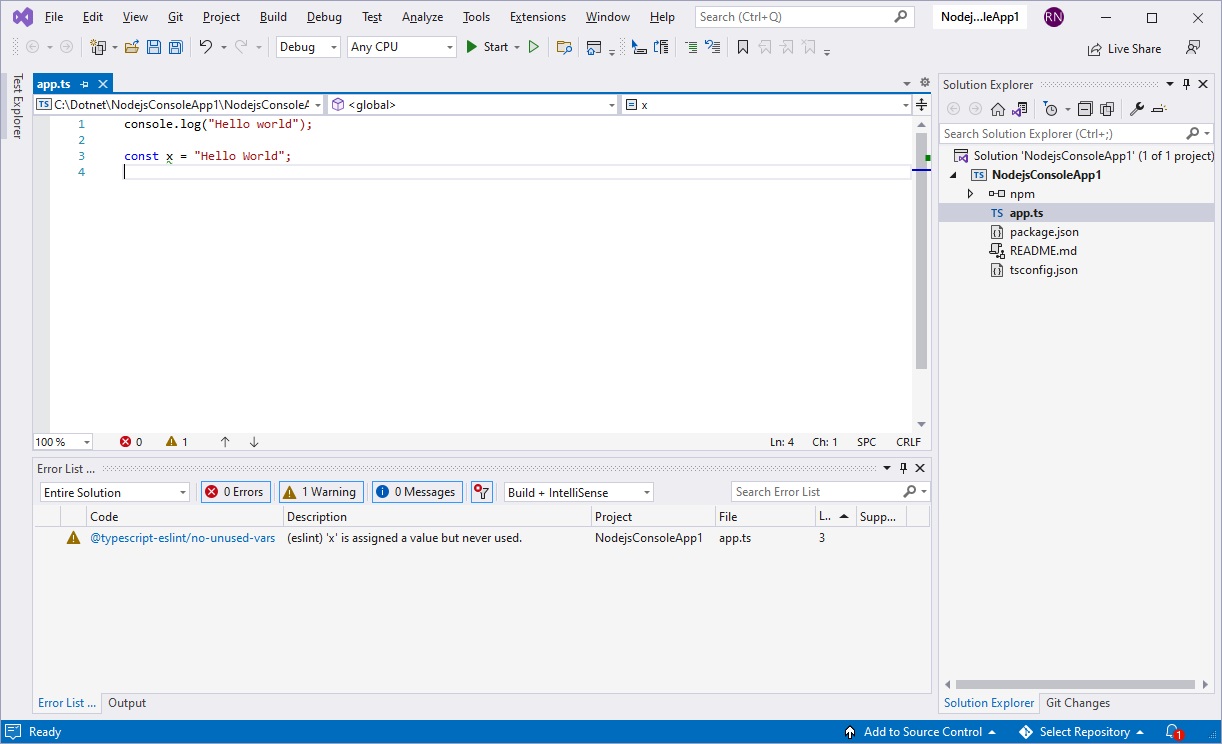
Select ‘Fix TypeScript Analyzer (ESLint) Errors if Possible’, and the errors are fixed where possible.
var is changed to const and a semicolon is added at the end. The rules can be changed to remove semicolons rather than adding them if that’s what you prefer. The no-unused-vars warning applying to x cannot be fixed automatically, so remains.
Fix an Entire Solution
Hit ctrl-z to undo that change. Now add a second project. Rename app.ts to app2.ts, and put some code in it as below. Right-click the solution in Solution Explorer.
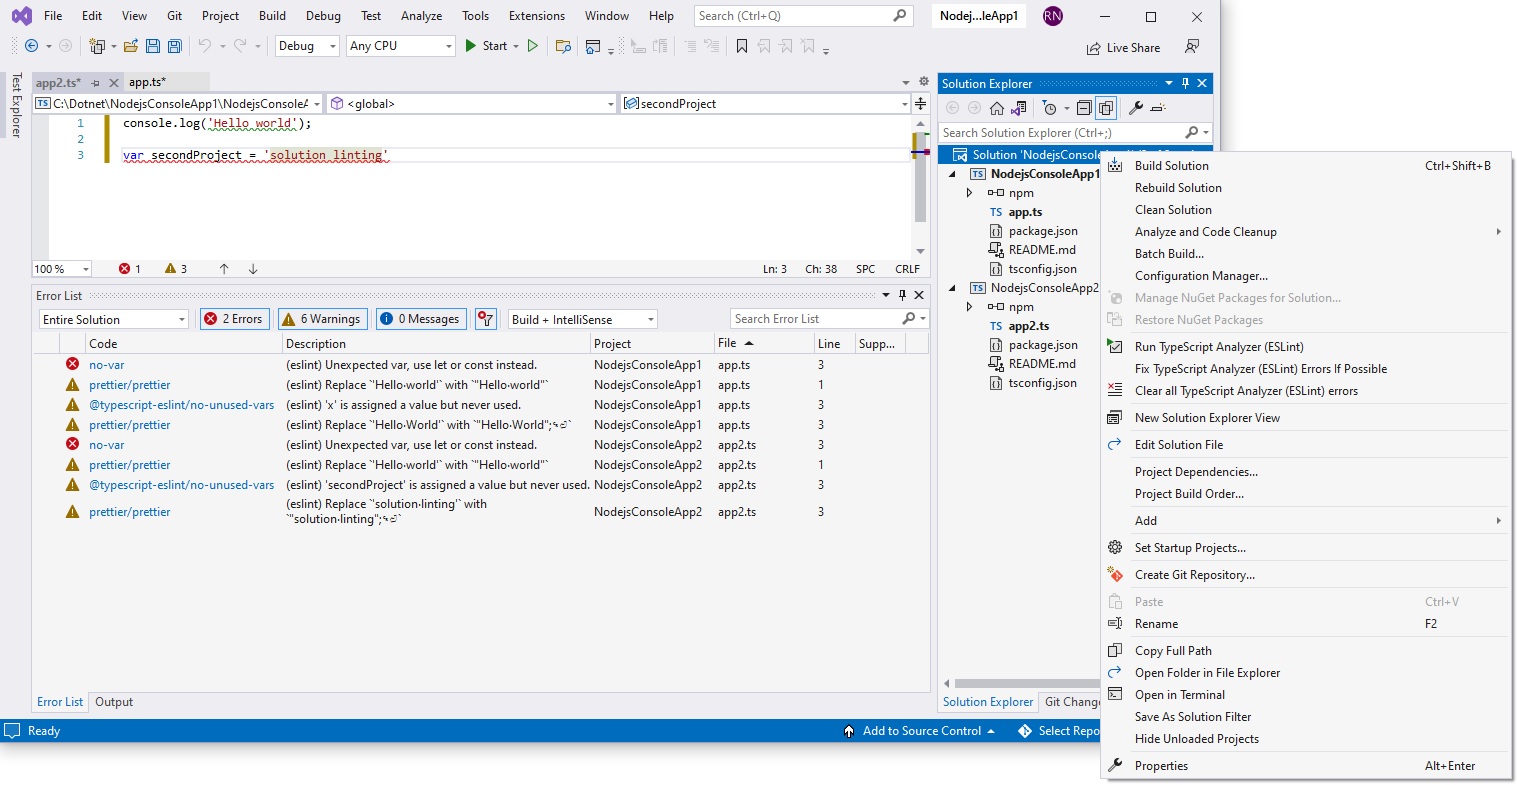
Select ‘Fix TypeScript Analyzer (ESLint) Errors if Possible’.
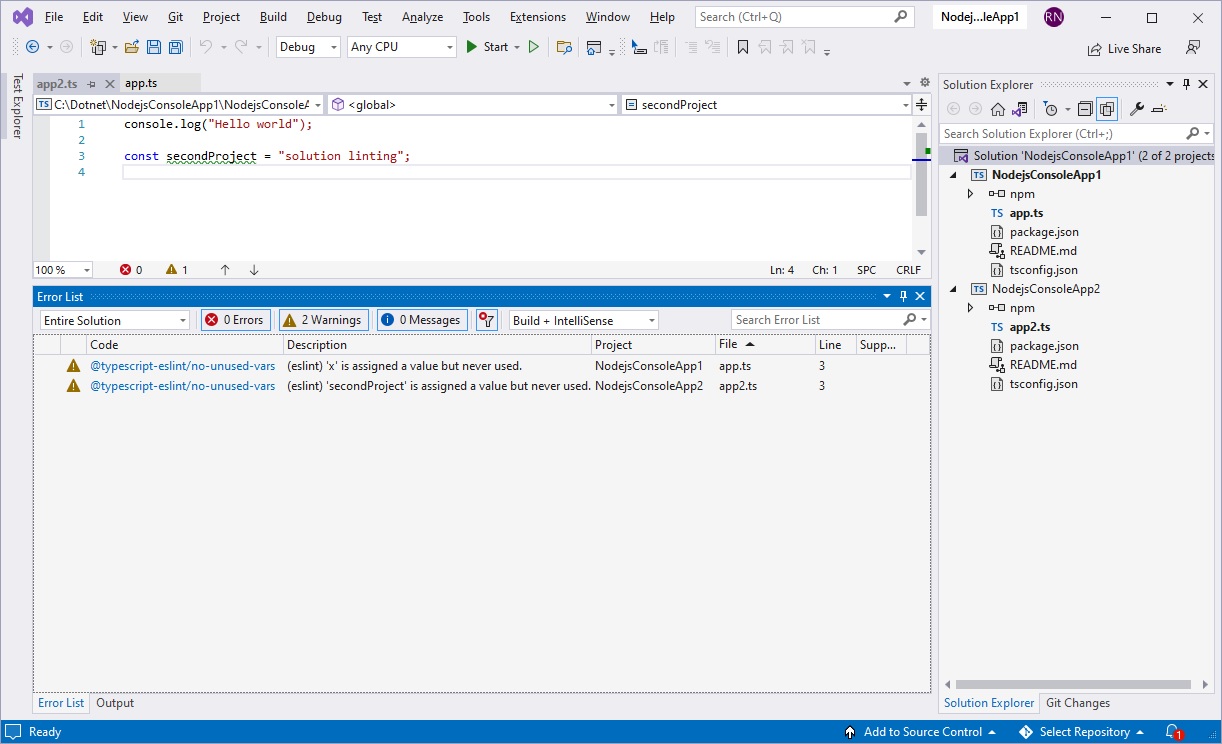
Linting errors and warnings in both projects are fixed where this is possible. The ones that remain are unused variable errors.
Stop a Build if There Are Linting Errors
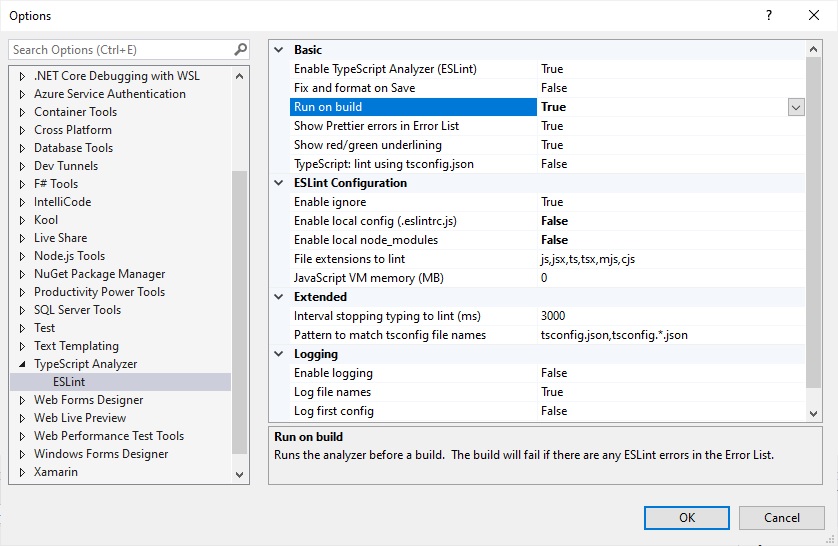
Hit ctrl-z to undo the last change in app2.ts. You should again get a ‘no-var’ linting error. Go to Tools/Options/TypeScript Analyzer/ESLint and change the ‘Run on Build’ option to true:
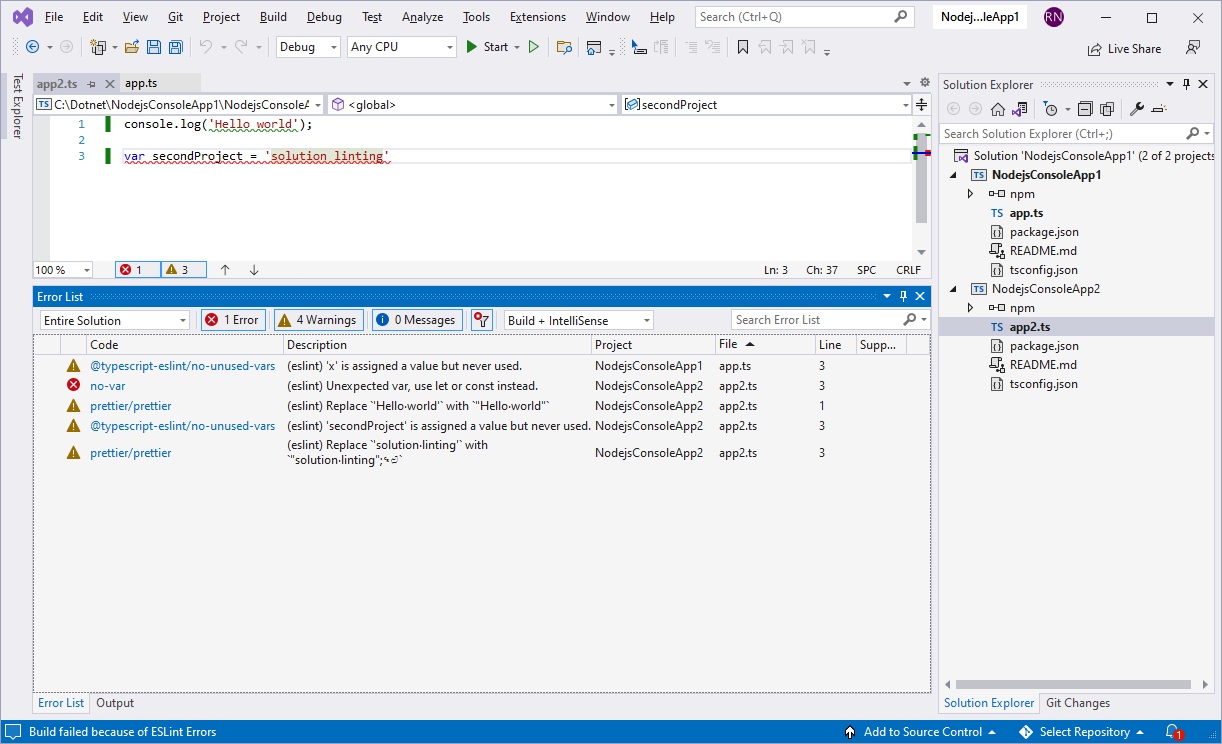
Click OK. Try to run the code in debug by hitting the green arrow, or Debug/Start Debugging. The build fails with an appropriate error message in the status bar at bottom left. As the message says, this build failure is because there are still ESLint errors.
Change a Rule to Generate a Warning
The build is failing because no-var generates a linting error. We can change this behavior by making it generate a warning, which will not stop a build.
Go to Tools/TypeScript Analyzer (ESLint)/Edit Default Config, and find the no-var rule in the configuration file that appears. Change ‘Error’ to ‘Warn’ and save the file:
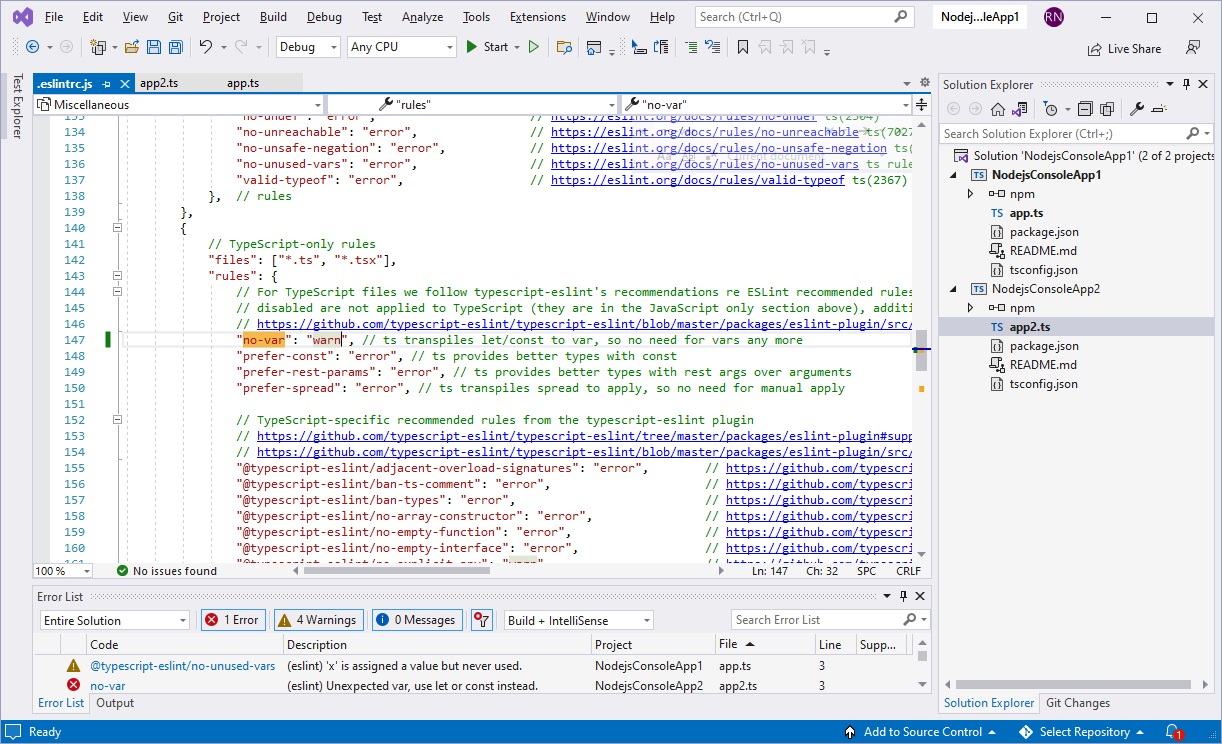
Build the code again and it succeeds. The previous error has become a warning.
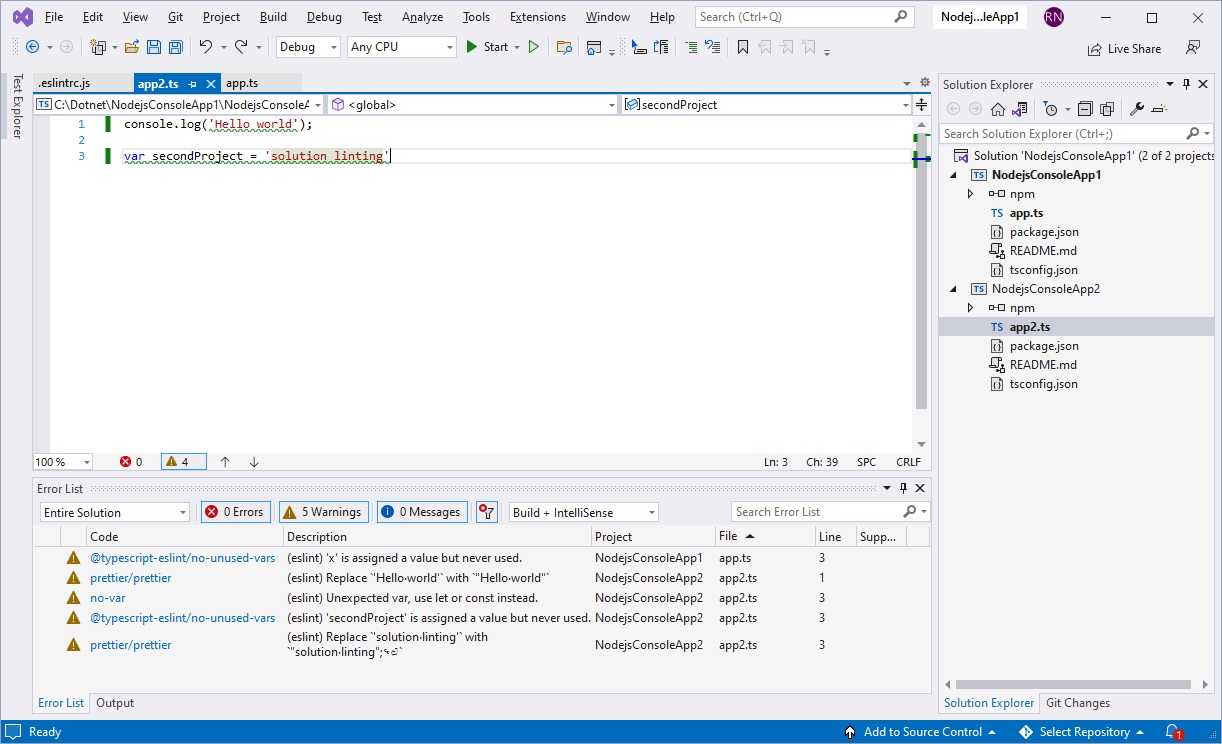
Use a TypeScript Rule That Needs Type Information
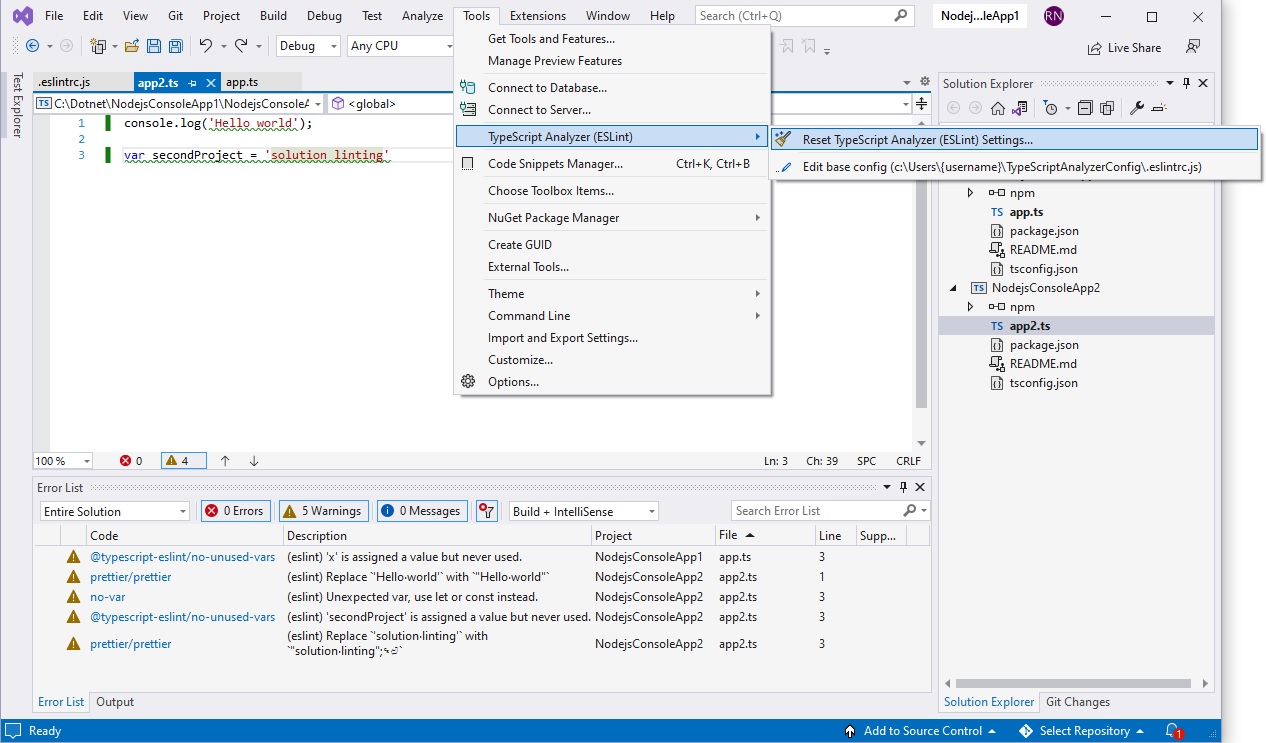
Reset your configuration and options to the default by selecting Tools/TypeScript Analyzer (ESLint)/Reset TypeScript Analyzer (ESLint) Settings and then clicking ‘Yes’ to confirm.
Go again to Tools/Options/TypeScript Analyzer (ESLint) and change the ‘TypeScript: lint using tsconfig.json’ option to true. This allows rules that need type information to be used. If you are using Visual Studio 2022 after v17.4 then you will need to set both ‘Enable local config (.eslintrc.js)’ and ‘Enable local node_modules’ back to False as well.
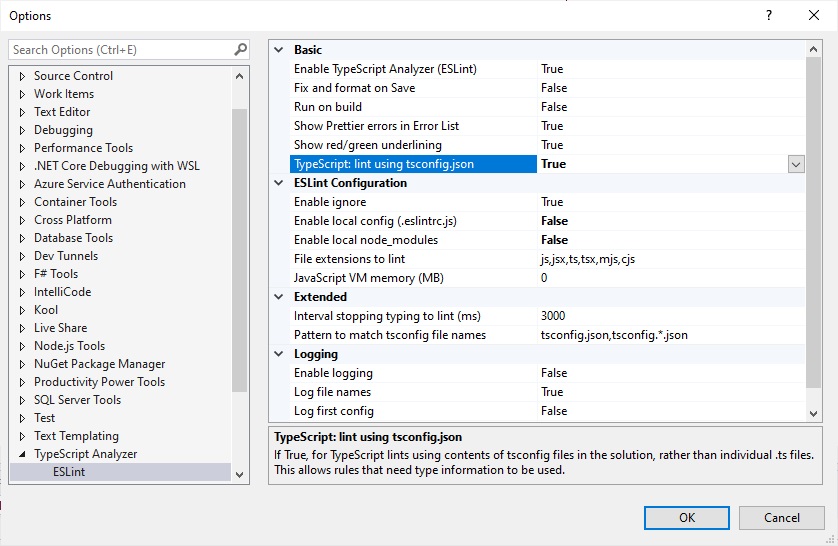
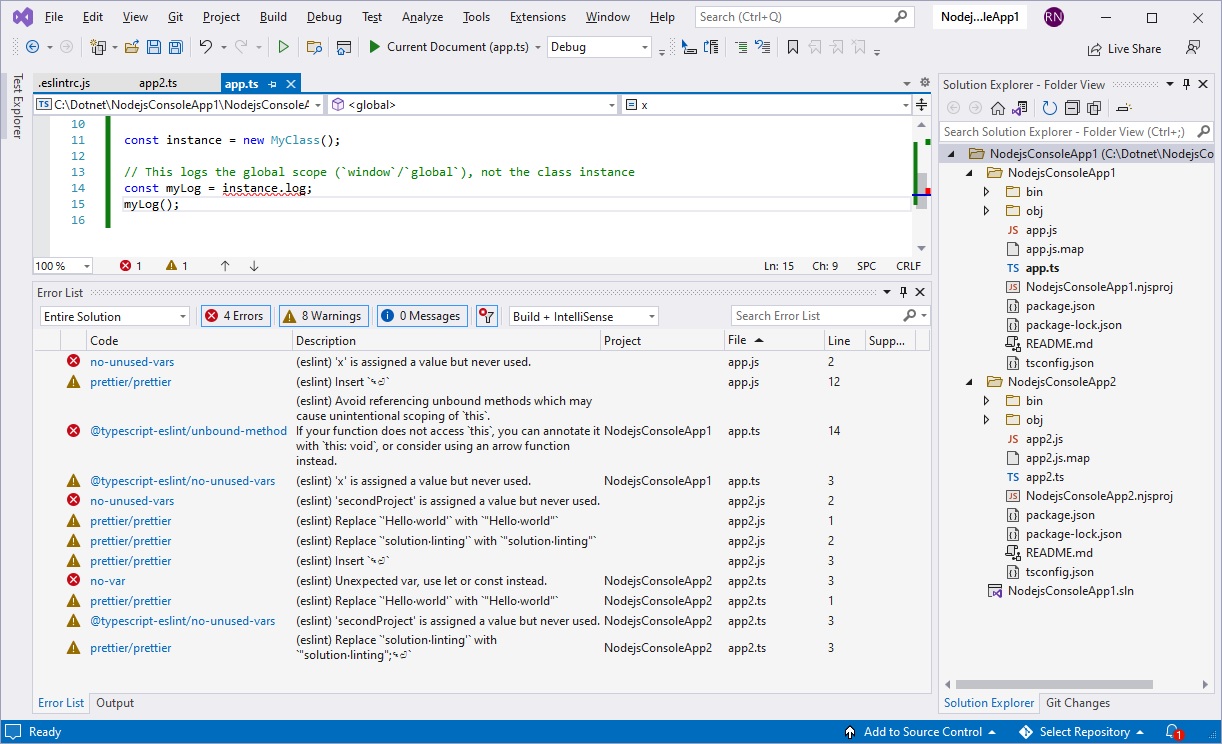
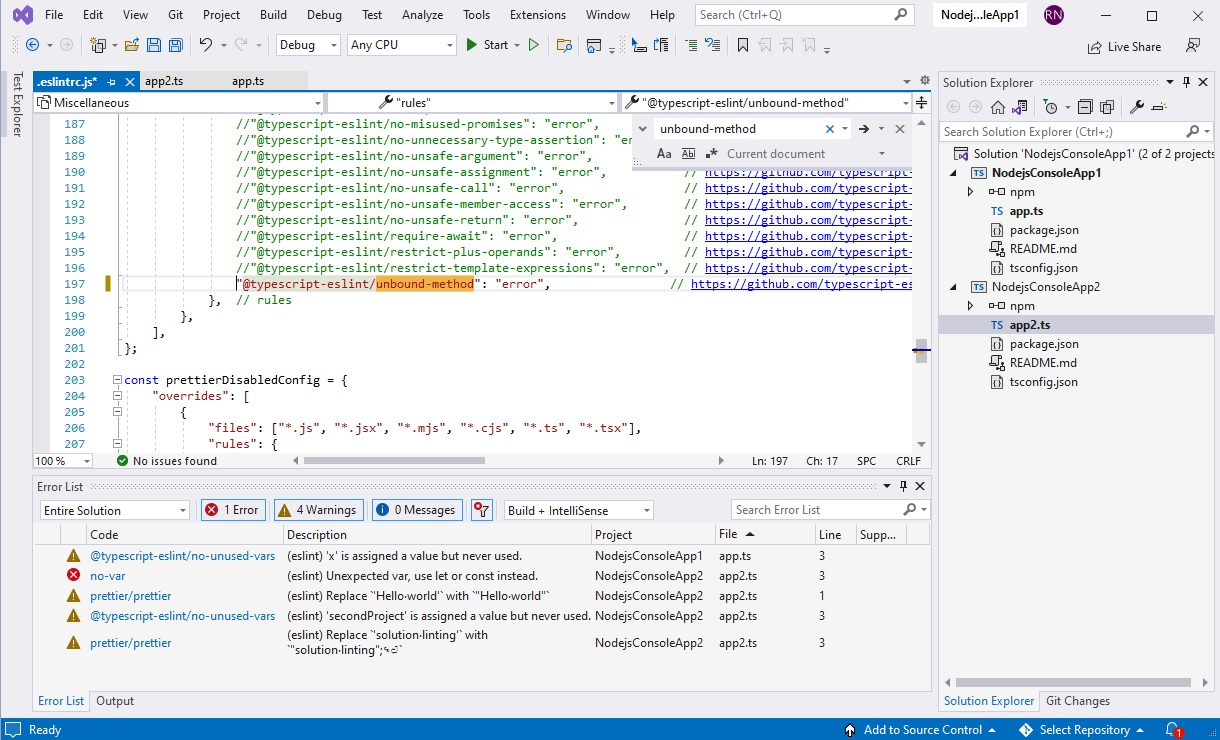
Click OK. Go to your .eslintrc.js configuration file, find the unbound-method rule. This is commented out because by default the ‘lint using tsconfig.json’ setting is set to false. Comment the rule in and save the changed .eslintrc.js file:
Put the code below in your app.ts, which is from the documentation for the rule.
class MyClass {
    public log(): void {
        console.log(this);
    }
}

const instance = new MyClass();

// This logs the global scope (`window`/`global`), not the class instance
const myLog = instance.log;
myLog();
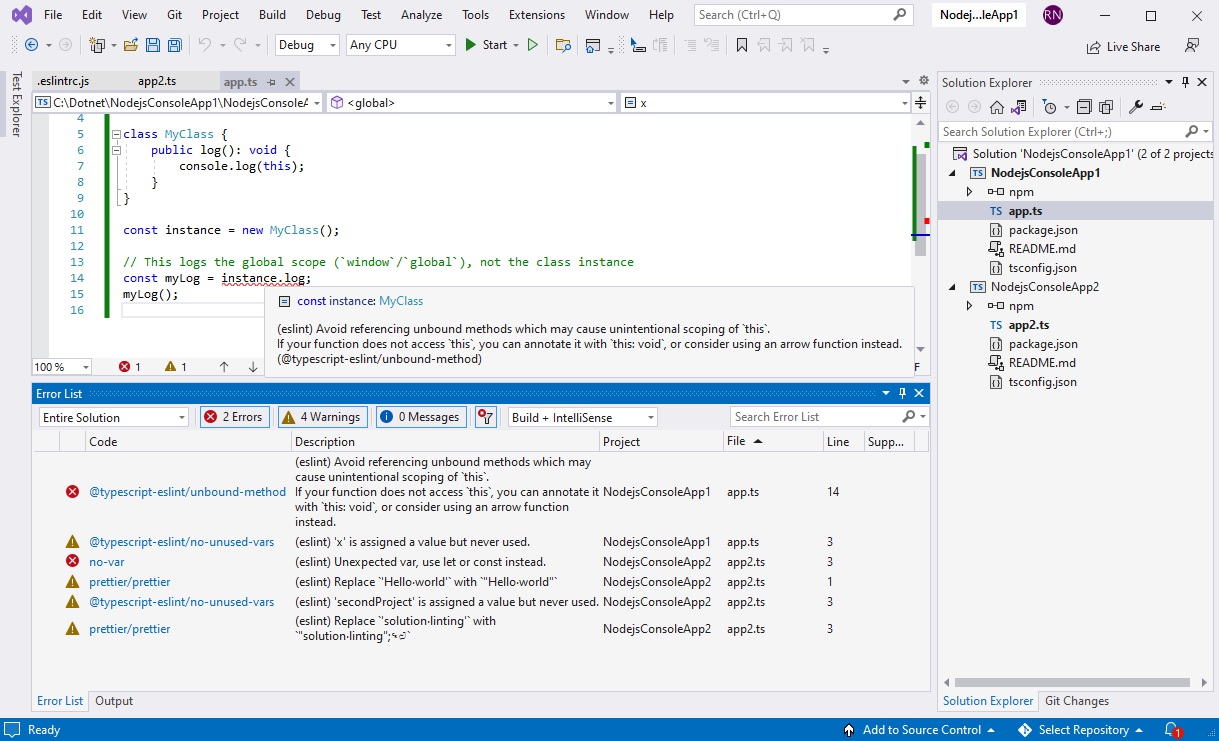
You should get the unbound-method error:
Lint in Folder View
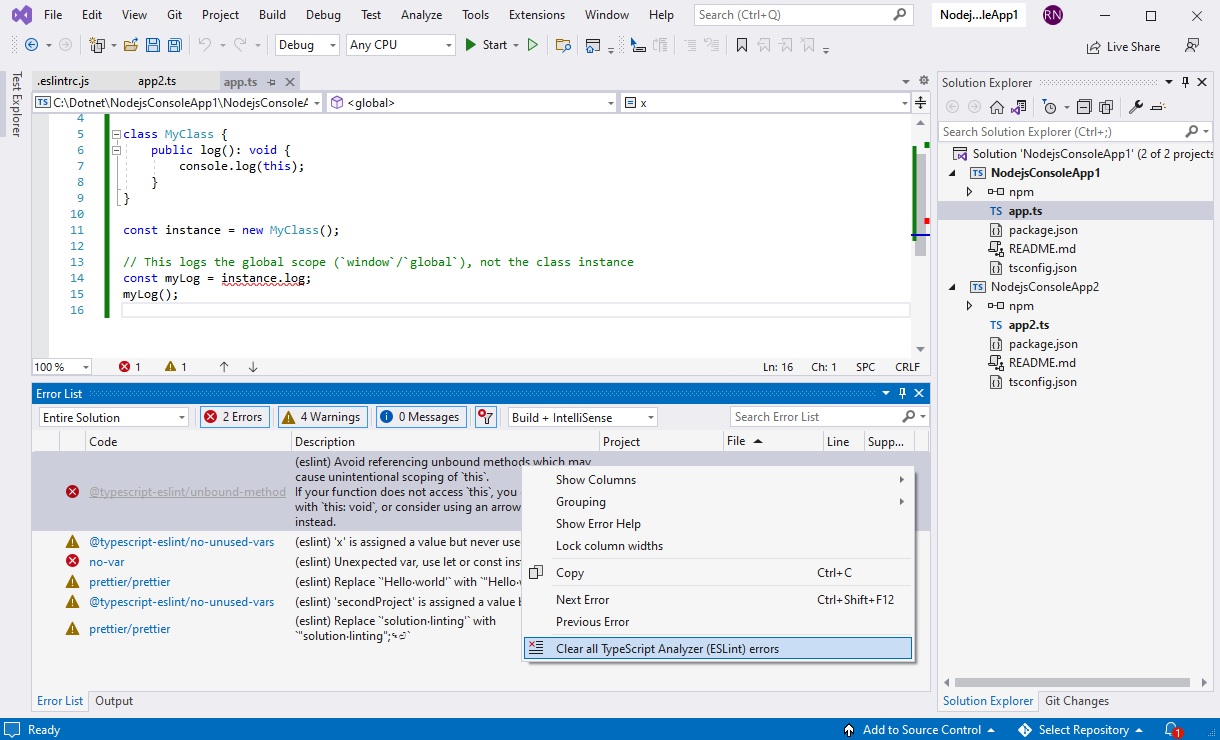
Rightclick in the Error List and select ‘Clear All TypeScript Analyzer (ESLint) Errors’. The errors will clear.
If you are in VS2019 or VS2022 switch to folder view. There is an icon in the Solution Explorer menu that allows you to do this: click it and then doubleclick ‘Folder View’. Expand the project folders.
Rightclick the topmost folder and select ‘Run TypeScript Analyzer (ESLint)’.
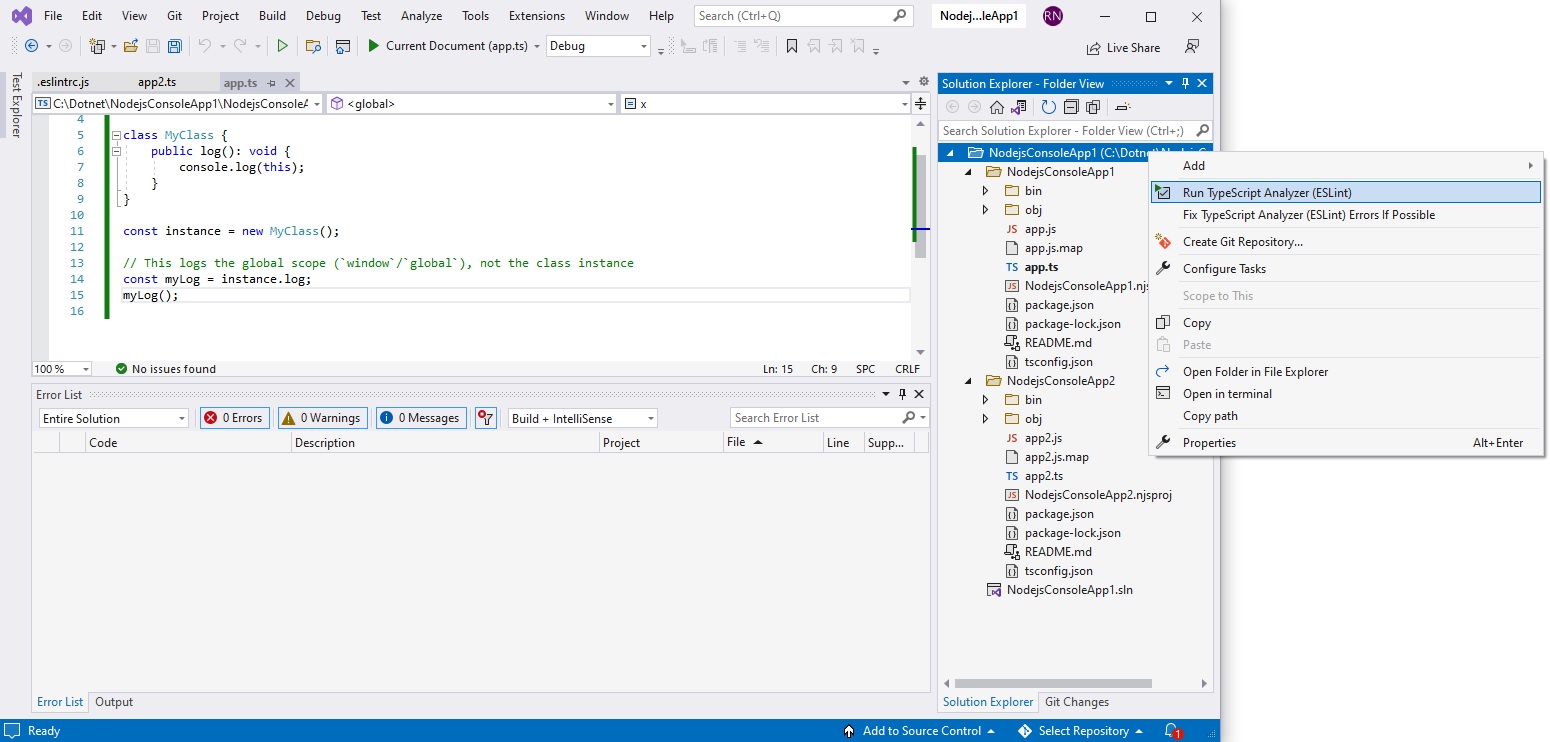
The Analyzer will run on all TypeScript and JavaScript files it finds in the folder and subfolders. Since it is no longer using Visual Studio projects to identify files to lint it will lint everything, including the generated JavaScript files, for example app.js.
